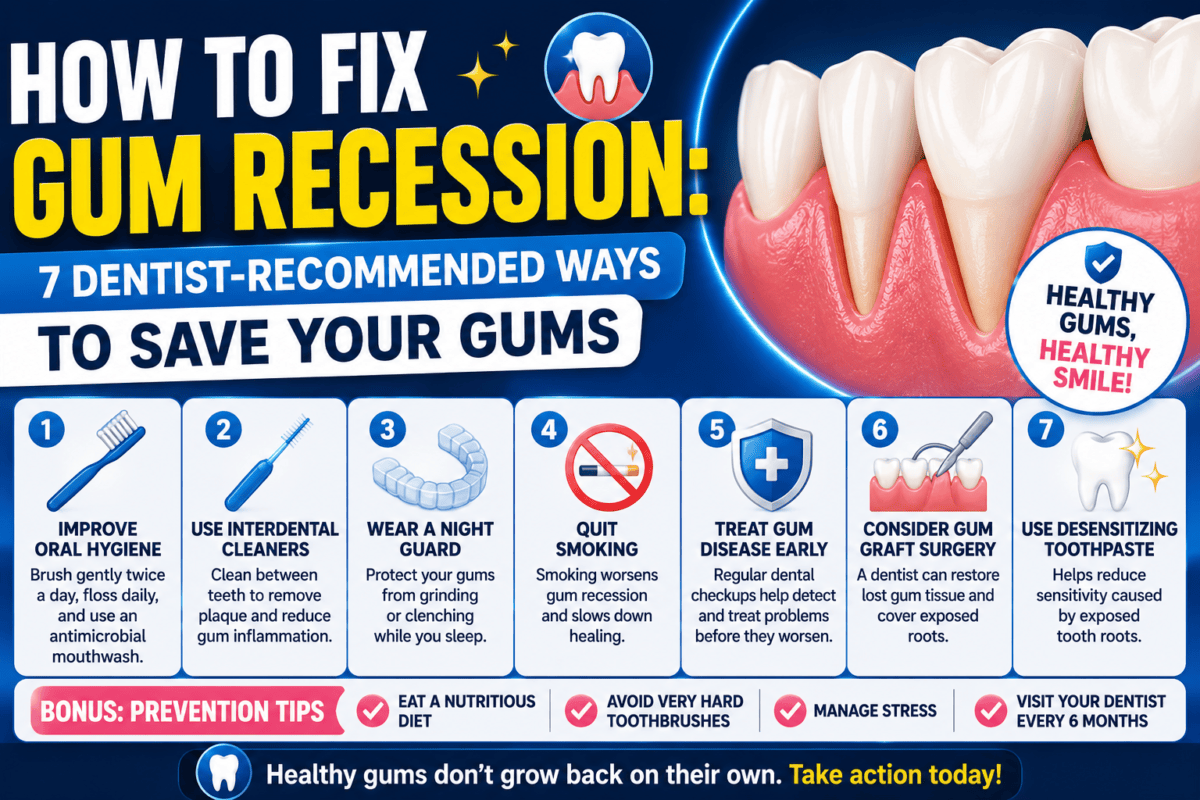
How to Fix Gum Recession: 7 Dentist-Recommended Ways to Save Your Gums

Noticed your teeth looking a little longer than they used to? Or felt a strange sensitivity when sipping cold water? These could be signs of gum recession — a common dental issue that many people don’t notice until it’s already happening. The good news is, with the right care, you can stop gum recession in its tracks and even restore your gums with the help of a trusted dentist.

Here’s a clear, easy-to-understand guide on how to fix gum recession, the top 7 dentist-recommended ways to save your gums, and what you can do today to protect your smile for life.

What Is Gum Recession?

Gum recession happens when the gum tissue around your teeth slowly wears away or pulls back. This exposes more of the tooth — and sometimes the root — and can lead to serious dental problems if left untreated.

Common signs of gum recession include:

  • Teeth that look longer than usual
  • Sensitivity to hot, cold, or sweet foods
  • A visible notch near the gum line
  • Bleeding when brushing or flossing
  • Tender or swollen gums
  • Loose or shifting teeth
  • Bad breath that doesn’t go away
  • Visible tooth roots

If you notice any of these signs, it’s important to act quickly.

Why Fixing Gum Recession Matters

Gum recession isn’t just a cosmetic issue. Left untreated, it can lead to:

  • Tooth decay at the root
  • Painful tooth sensitivity
  • Gum infections
  • Loose teeth
  • Tooth loss
  • Bone loss in the jaw

Fixing gum recession early protects both your oral health and your overall well-being.

What Causes Gum Recession?

Before learning how to fix it, it helps to understand what causes it. Common causes include:

  • Brushing too hard
  • Using a hard-bristled toothbrush
  • Gum disease
  • Poor oral hygiene
  • Smoking or tobacco use
  • Genetics
  • Hormonal changes
  • Teeth grinding or clenching
  • Misaligned bite
  • Aging
  • Trauma to the mouth

Most cases involve more than one factor. Identifying the cause is the first step to choosing the right treatment.

7 Dentist-Recommended Ways to Fix Gum Recession

Here are seven of the most effective ways dentists use to treat gum recession and protect your smile.

1. Improve Your Brushing and Flossing Habits

Sometimes, the simplest changes can make the biggest difference. Many cases of mild gum recession are caused by aggressive brushing or poor oral hygiene. Try these adjustments:

  • Use a soft-bristled toothbrush
  • Brush gently in small, circular motions
  • Don’t press too hard
  • Brush for at least two minutes twice a day
  • Floss daily, but gently
  • Use a fluoride toothpaste
  • Replace your toothbrush every three months

Even an electric toothbrush with a pressure sensor can help protect your gums.

2. Get a Deep Dental Cleaning (Scaling and Root Planing)

This is often the first step a dentist takes for gum recession caused by plaque or early gum disease. The deep cleaning helps:

  • Remove built-up plaque and tartar
  • Smooth tooth roots
  • Reduce bacteria
  • Help gums reattach to teeth
  • Stop further recession
  • Improve overall gum health

A deep cleaning is more thorough than a regular dental cleaning and can be a turning point for early gum issues.

3. Wear a Custom Night Guard for Teeth Grinding

If you grind or clench your teeth, you may not even realize it. Over time, this puts extra pressure on your gums and can lead to recession. A custom night guard from your dentist can:

  • Protect your gums and teeth
  • Reduce pressure during sleep
  • Prevent further recession
  • Ease morning jaw soreness
  • Improve overall oral comfort

Many patients see noticeable gum improvement within weeks of wearing one.

4. Use Antibacterial Mouth Rinses

Your dentist might recommend a special mouth rinse to fight bacteria and protect your gums. These rinses can:

  • Reduce plaque buildup
  • Lower inflammation
  • Help damaged gum tissue heal
  • Freshen breath
  • Prevent gum disease from getting worse

Use the rinse as directed and combine it with proper brushing and flossing for the best results.

5. Correct Bite or Alignment Issues

Crooked teeth or a misaligned bite can put uneven pressure on your gums and lead to recession. Fixing alignment issues with orthodontic treatment can:

  • Improve gum health
  • Spread pressure evenly across teeth
  • Help gums heal naturally
  • Improve oral hygiene
  • Prevent further damage

Clear aligners are a popular choice for adults because they’re nearly invisible and comfortable to wear.

6. Consider a Gum Graft

For more advanced cases, your dentist may recommend a gum graft. This procedure helps restore lost gum tissue and protect the exposed tooth roots. During the procedure, your dentist:

  • Takes a small piece of tissue from another area in your mouth
  • Places it where the gums have receded
  • Helps the tissue grow back stronger
  • Restores a healthier gum line
  • Reduces tooth sensitivity
  • Improves the look of your smile

Gum grafts are highly effective and provide long-term results.

7. Try the Pinhole Surgical Technique (PST)

This is a modern, less invasive option for fixing gum recession. Unlike traditional gum surgery, PST doesn’t require cuts or stitches. Your dentist:

  • Makes a tiny pinhole in the gum
  • Gently shifts existing gum tissue over the exposed area
  • Covers the receded section without grafting
  • Promotes faster healing
  • Reduces post-treatment discomfort

Many patients prefer this technique because it offers great results with minimal downtime.

Additional Tips to Support Healthy Gums

Along with the treatments above, here are some simple lifestyle changes to help your gums heal and stay healthy.

Eat a Balanced Diet

Your gums need nutrients to stay strong. Try to include:

  • Leafy greens
  • Citrus fruits in moderation
  • Lean proteins
  • Whole grains
  • Nuts and seeds
  • Dairy products
  • Plenty of water

Avoid sugary snacks and processed foods that can harm your gums.

Quit Smoking

Smoking is one of the biggest causes of gum disease and recession. Quitting can:

  • Improve gum health
  • Reduce inflammation
  • Speed up healing
  • Lower the risk of tooth loss
  • Improve your overall health

It’s one of the best things you can do for your smile.

Stay Hydrated

Drinking plenty of water throughout the day helps:

  • Wash away bacteria
  • Reduce dry mouth
  • Support saliva production
  • Maintain healthy gums
  • Strengthen tooth enamel

Aim for at least 8 glasses a day.

Manage Stress

High stress can lead to grinding, clenching, and poor oral habits. Try:

  • Yoga
  • Meditation
  • Deep breathing exercises
  • Regular physical activity
  • Getting enough sleep

A calmer mind supports a healthier mouth.

Visit Your Dentist Regularly

Even with the best home care, regular dental visits are essential. Your dentist can:

  • Spot early signs of recession
  • Provide deep cleanings
  • Adjust your treatment plan
  • Track your gum health
  • Help you avoid bigger problems

Most adults should see a dentist every six months.

When to See a Dentist About Gum Recession

You should schedule a dental visit if you notice:

  • Tooth sensitivity that doesn’t go away
  • Gums that bleed easily
  • Teeth appearing longer than before
  • Pockets between teeth and gums
  • Loose teeth
  • Pain or discomfort in your gums
  • Persistent bad breath
  • Visible roots of your teeth

Even mild symptoms can signal early-stage recession, so it’s best to act quickly.

Can Receding Gums Grow Back on Their Own?

Unfortunately, gum tissue can’t regrow on its own once it’s lost. However, with proper treatment, dentists can restore lost gum tissue, cover exposed roots, and protect your overall gum health. The earlier you treat it, the better the outcome.

What Happens If Gum Recession Is Left Untreated?

Ignoring gum recession can lead to serious dental issues, including:

  • Severe tooth sensitivity
  • Cavities below the gum line
  • Bone loss in the jaw
  • Infections
  • Loose or shifting teeth
  • Tooth loss
  • Cosmetic concerns affecting confidence

The good news is that all of these problems can be prevented with timely care.

Frequently Asked Questions

Can gum recession be reversed naturally?

Gum tissue can’t grow back naturally, but you can stop further recession and protect your gums with proper care, lifestyle changes, and professional treatment.

Is gum recession treatment painful?

Most treatments, including deep cleanings, gum grafts, and the Pinhole Surgical Technique, are done with local anesthesia. Patients usually experience little to no pain during the procedure.

How long does it take to recover from a gum graft?

Most patients recover within one to two weeks. Full healing of the gum tissue can take a few months, but discomfort is usually mild and easy to manage.

Can children develop gum recession?

Yes, although it’s less common. Causes in children include aggressive brushing, poor oral hygiene, gum disease, or genetics. Regular dental visits help catch the issue early.

How can I prevent gum recession from coming back?

Prevention starts with good oral hygiene. Use a soft-bristled brush, floss daily, avoid smoking, treat teeth grinding, and visit your dentist every six months. Consistent care makes a big difference.

If you’re noticing signs of gum recession or want to keep your gums strong and healthy for life, the team at Ethos Modern Dental & Implant Center is here to help. Dr. Sreelakshmi Keesara offers gentle, expert dental care that protects your smile, restores your gums, and gives you the confidence of a healthy mouth.
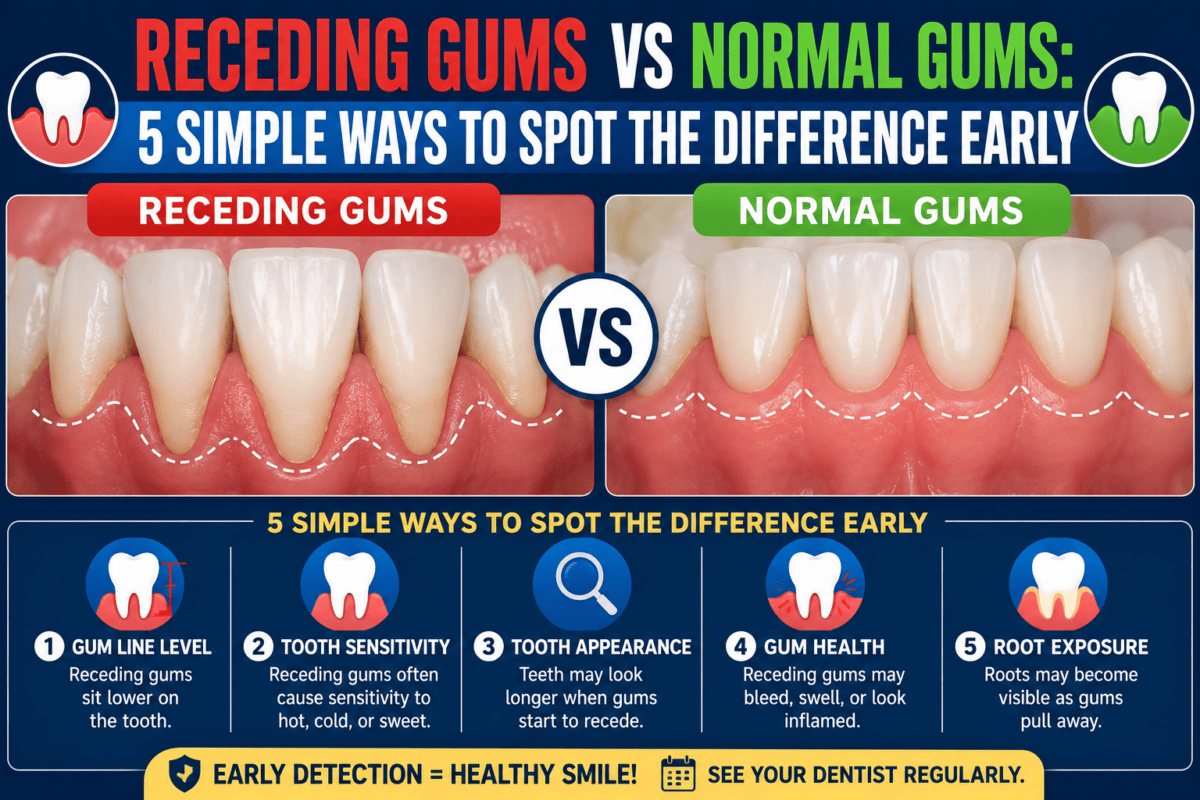
Receding Gums vs Normal Gums: 5 Simple Ways to Spot the Difference Early

Healthy gums are the foundation of a beautiful smile — but how can you tell if yours are healthy or starting to recede? Many people don’t notice gum recession until it’s already advanced. Catching the early signs can make all the difference between a quick fix and a more serious dental treatment.

If you’ve ever wondered how to tell the difference between receding gums and normal gums, you’re in the right place. Here’s a simple guide to spotting the warning signs early, what your gums should look like, and what to do if something seems off.

Why It’s Important to Spot Gum Recession Early

Receding gums don’t usually cause pain in the early stages, which makes them easy to miss. But once recession starts, it doesn’t reverse on its own. Catching it early helps you:

  • Avoid expensive treatments
  • Prevent tooth sensitivity
  • Protect your tooth roots
  • Stop further gum loss
  • Keep your smile looking healthy
  • Reduce the risk of tooth loss

The sooner you act, the easier it is to manage.

What Do Normal, Healthy Gums Look Like?

Before learning how to spot recession, it helps to know what healthy gums look like. Normal gums are usually:

  • Light pink or coral pink in color
  • Firm to the touch
  • Evenly shaped around each tooth
  • Free from bleeding
  • Snug against the teeth
  • Smooth or slightly stippled (like the texture of an orange peel)
  • Painless and comfortable

If your gums look and feel like this, you’re in great shape.

What Do Receding Gums Look Like?

Receding gums are different in several visible and physical ways. Common signs include:

  • A gum line that appears uneven
  • Teeth that look longer than before
  • Exposed tooth roots
  • Sensitive areas near the gum line
  • Redness or swelling
  • Tender or sore gums
  • Small pockets between teeth and gums
  • A “notched” feeling at the base of the tooth

Even small changes can be early warning signs.

5 Simple Ways to Spot the Difference Between Receding Gums and Normal Gums

Here are five easy ways to check your gums at home and tell whether they’re healthy or starting to recede.

1. Check the Color of Your Gums

Color can tell you a lot about gum health.

Normal Gums:

  • Light pink or coral pink
  • Even color throughout
  • No dark patches near the gum line
  • No redness

Receding or Unhealthy Gums:

  • Darker red or purplish color
  • Uneven shades around the teeth
  • Inflamed, irritated patches
  • Swollen or shiny appearance

If your gums look more red than pink, it might be time to see a dentist.

2. Look at the Length of Your Teeth

Teeth can look longer when the gums begin to pull away.

Normal Gums:

  • Cover the base of the tooth evenly
  • Teeth appear consistent in length
  • No visible roots
  • Smooth and balanced gum line

Receding Gums:

  • Teeth appear longer than usual
  • Roots may begin to show
  • Uneven gum line across different teeth
  • Spaces between teeth becoming more noticeable

Take a photo of your smile every few months — small changes are easier to spot when compared.

3. Notice Tooth Sensitivity

Sensitivity is one of the earliest signs of gum recession.

Normal Gums:

  • Comfortable with hot and cold foods
  • No pain from sweet treats
  • No discomfort while brushing
  • No sharp pains when chewing

Receding Gums:

  • Sharp pain when drinking cold water
  • Discomfort while eating hot foods
  • Sensitive spots near the gum line
  • Pain during brushing or flossing

When the gum tissue recedes, it exposes nerves under the enamel, leading to increased sensitivity.

4. Watch for Bleeding or Swelling

Healthy gums shouldn’t bleed when you brush or floss.

Normal Gums:

  • Firm and pink
  • No bleeding during brushing
  • No swelling or puffiness
  • No tenderness when touched

Receding Gums:

  • Bleed when brushing or flossing
  • Feel sore or tender
  • Look swollen or puffy
  • May bleed even with light contact

If you see blood on your toothbrush or in the sink, don’t ignore it. It’s often one of the first signs of gum problems.

5. Feel the Gum Line With Your Tongue

You can often feel changes in your gums before you can see them.

Normal Gums:

  • Smooth, even feel along the teeth
  • No bumps, ridges, or notches
  • No tender spots when touched
  • Even pressure around all teeth

Receding Gums:

  • A notched feeling at the tooth base
  • Rough or uneven gum line
  • Exposed tooth roots that feel different
  • Small pockets along the gum line

This simple at-home check can give you a quick idea of how your gums are doing.

Other Subtle Signs of Receding Gums

Beyond the five main signs, you should also watch for:

  • Bad breath that won’t go away
  • A loose or shifting tooth
  • Food getting stuck in new places
  • Color changes near the gum line
  • Pain when biting down
  • Persistent gum discomfort

These signs may not always be obvious, but they should never be ignored.

What Causes Gum Recession?

Knowing what causes gum recession can help you prevent it. Common causes include:

  • Brushing too hard or with a stiff brush
  • Gum disease (gingivitis or periodontitis)
  • Poor oral hygiene
  • Smoking or chewing tobacco
  • Genetics
  • Misaligned teeth
  • Teeth grinding or clenching
  • Aging
  • Hormonal changes
  • Trauma or injury
  • Poorly fitting dental work

Often, more than one factor plays a role at the same time.

How to Prevent Receding Gums

You can help protect your gums every day with simple habits. Try these dentist-approved tips:

  • Use a soft-bristled toothbrush
  • Brush in gentle circular motions
  • Floss daily
  • Avoid using your teeth as tools
  • Rinse with a mouthwash recommended by your dentist
  • Avoid smoking or chewing tobacco
  • Manage stress to reduce grinding
  • Drink plenty of water
  • Eat a balanced diet
  • Visit your dentist every 6 months

Healthy habits go a long way in keeping your gums strong.

When to See a Dentist

If you notice any of the following, it’s a good idea to schedule a dental visit:

  • Bleeding gums
  • Sensitive teeth
  • Teeth looking longer than usual
  • Visible gum changes
  • Pain or discomfort in the gums
  • Loose or shifting teeth
  • Persistent bad breath
  • A receding gum line

Early professional evaluation makes treatment easier and more successful.

What Happens If You Ignore Receding Gums?

Untreated gum recession can lead to serious dental problems, such as:

  • Increased tooth sensitivity
  • Higher risk of cavities at the root
  • Gum infections
  • Loose teeth
  • Tooth loss
  • Bone loss in the jaw
  • Cosmetic concerns

The earlier the issue is treated, the easier it is to manage and reverse.

How Dentists Treat Gum Recession

Depending on how mild or advanced the recession is, your dentist may recommend:

  • A deep cleaning (scaling and root planing)
  • A change in brushing habits
  • A custom night guard
  • Antibacterial mouth rinses
  • Orthodontic treatment
  • Gum grafting
  • The Pinhole Surgical Technique
  • Composite bonding to cover exposed roots

Your dentist will guide you toward the most effective solution for your case.

Frequently Asked Questions

Can I tell if my gums are receding just by looking in the mirror?

Yes, basic signs like color, length of teeth, and gum line changes are visible in the mirror. However, only a dentist can confirm and measure the severity of recession.

How can I tell if my gums are receding or just naturally smaller?

Some people naturally have higher or thinner gum lines, but true recession involves changes over time. Comparing photos and noting symptoms like sensitivity or bleeding can help.

Do receding gums always mean I have gum disease?

Not always. Gum recession can be caused by many factors, including aggressive brushing, grinding, or genetics. But gum disease is one of the most common causes.

Can children have receding gums?

Yes. Although less common in kids, recession can happen due to aggressive brushing, gum infections, misaligned teeth, or trauma. Regular dental checkups help catch it early.

Can lifestyle changes alone improve receding gums?

For very mild cases, better brushing habits, flossing, and quitting smoking can slow or stop further recession. However, established gum recession often requires professional treatment to fully address.

If you’ve noticed signs of gum recession or want a professional checkup, the team at Ethos Modern Dental & Implant Center is here to help. Dr. Sreelakshmi Keesara provides gentle, expert care to help you spot gum issues early and protect your smile for life.

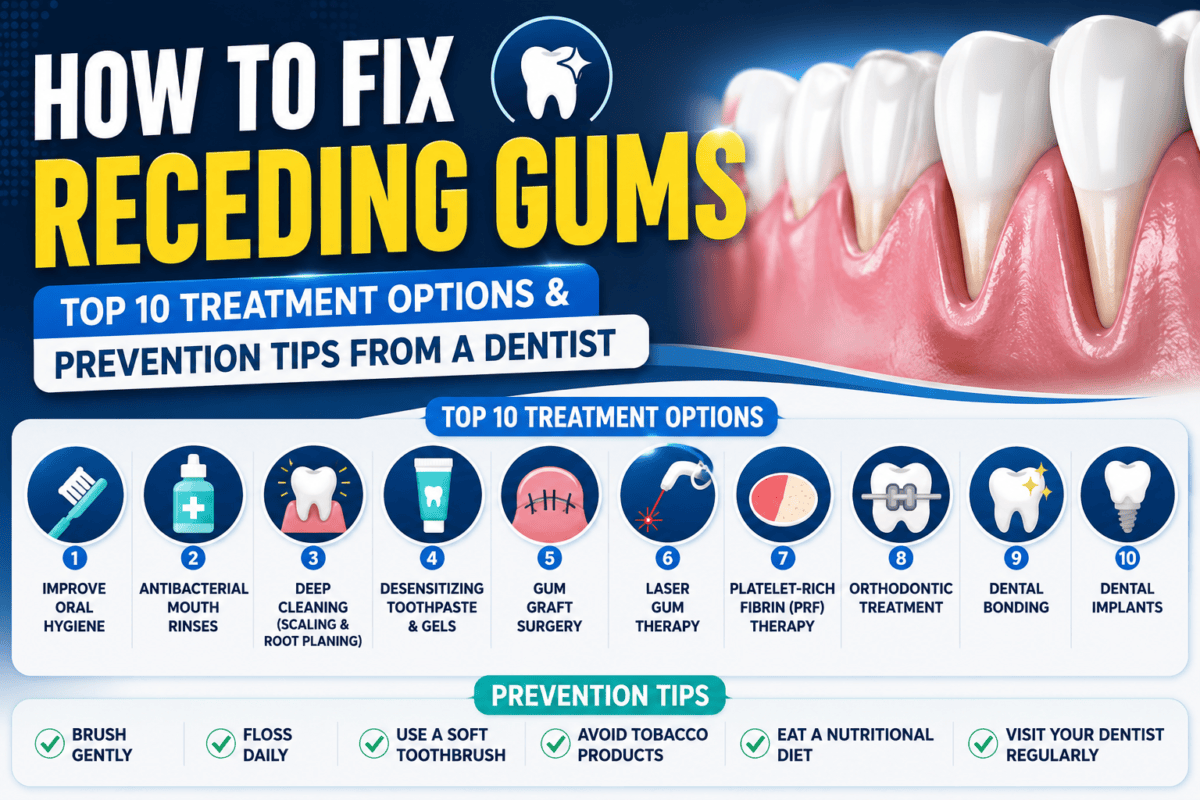
How to Fix Receding Gums: Top 10 Treatment Options & Prevention Tips from a Dentist

Have you noticed your teeth looking longer than they used to? Or maybe you’ve spotted your gums pulling back, making your smile feel a little different? You might be dealing with receding gums. It’s one of the most common dental concerns adults face, and the good news is — it can be treated, slowed down, and even prevented with the right care.

Here’s a clear, dentist-approved guide to receding gums, the top 10 ways to fix and treat them, and simple prevention tips you can start today.

What Are Receding Gums?

Receding gums, also called gum recession, happen when the gum tissue around your teeth slowly pulls back or wears away. This exposes more of your tooth — and sometimes even the root. Over time, this can lead to:

  • Increased tooth sensitivity
  • A longer-looking appearance of teeth
  • Pockets forming between the gums and teeth
  • Higher risk of cavities at the root
  • Loose teeth in severe cases
  • Tooth loss if not treated

The earlier you catch it, the easier it is to fix.

What Causes Receding Gums?

Receding gums can happen for many reasons. Sometimes it’s something you’re doing without realizing, and sometimes it’s part of natural aging. Some of the most common causes include:

  • Brushing your teeth too hard
  • Using a hard-bristled toothbrush
  • Gum disease or infection
  • Poor oral hygiene
  • Smoking or tobacco use
  • Genetics
  • Hormonal changes
  • Teeth grinding or clenching
  • Crooked or misaligned teeth
  • Aging
  • Poorly fitting dentures
  • Trauma or injury

Often, more than one of these factors plays a role.

Signs You Might Have Receding Gums

Many people don’t notice gum recession until it becomes more obvious. Watch out for these early signs:

  • Teeth that look longer than before
  • Sensitivity to hot, cold, or sweet foods
  • Visible roots of your teeth
  • Bleeding gums when brushing or flossing
  • Gum line appearing uneven
  • Tender or sore gums
  • Bad breath
  • A loose feeling in one or more teeth

If you notice any of these, it’s time to take action.

Top 10 Treatment Options for Receding Gums

The right treatment for you depends on how mild or advanced your gum recession is. Here are the most effective options dentists recommend.

1. Deep Cleaning (Scaling and Root Planing)

This is often the first step in treating receding gums caused by gum disease. Your dentist will:

  • Remove plaque and tartar above and below the gumline
  • Smooth out rough surfaces on the roots
  • Help your gums reattach to the teeth
  • Reduce inflammation
  • Stop further recession

It’s a deep, more thorough cleaning that helps your mouth heal.

2. Improved At-Home Oral Hygiene

Sometimes, gum recession can be slowed simply by adjusting how you care for your teeth. Tips include:

  • Use a soft-bristled toothbrush
  • Brush in gentle circles, not back-and-forth
  • Avoid pressing too hard while brushing
  • Floss daily and gently
  • Switch to an electric toothbrush
  • Use a fluoride or sensitive-teeth toothpaste

Consistent, gentle care can make a big difference over time.

3. Antimicrobial Mouth Rinses

Your dentist may recommend a prescription or over-the-counter mouthwash that:

  • Reduces bacteria
  • Calms inflammation
  • Prevents further gum damage
  • Promotes healing
  • Helps fight bad breath

Use it daily as part of your routine for best results.

4. Night Guard for Teeth Grinding

If grinding is causing your gums to recede, a custom night guard can:

  • Reduce pressure on your teeth and gums
  • Protect enamel
  • Improve jaw alignment
  • Prevent further recession
  • Ease morning soreness

It’s a simple solution with long-term benefits.

5. Orthodontic Treatment

Misaligned teeth can put uneven pressure on your gums and cause recession. Clear aligners or other orthodontic treatments can:

  • Straighten teeth
  • Improve bite alignment
  • Reduce gum stress
  • Allow gums to heal naturally
  • Improve overall oral health

For mild to moderate cases, orthodontic care is a long-term fix.

6. Gum Grafting

For more advanced gum recession, your dentist may recommend a gum graft. This involves:

  • Taking gum tissue from another area of your mouth
  • Placing it where the gums have receded
  • Helping the tissue grow back stronger
  • Restoring a healthier gum line
  • Protecting tooth roots

This procedure is one of the most effective solutions for visible gum loss.

7. Pinhole Surgical Technique (PST)

This is a newer, less invasive option for gum recession. With this method, your dentist:

  • Makes a small pinhole in the gum
  • Gently repositions the existing tissue
  • Covers exposed tooth roots
  • Avoids stitches or cutting
  • Shortens recovery time

Many patients prefer this option because it offers great results with less downtime.

8. Tissue Regeneration Procedures

If the bone supporting your teeth has been damaged, your dentist may use:

  • Membranes
  • Growth proteins
  • Tissue-stimulating gels

These help regenerate lost tissue and bone, giving your gums a stronger foundation.

9. Composite Bonding or Pink Veneers

If you’ve experienced cosmetic concerns from gum recession, your dentist might recommend:

  • Tooth-colored bonding to cover exposed roots
  • Pink composite material to recreate the gum line
  • Veneers designed to mask recession

These options improve the appearance of your smile while protecting your teeth.

10. Treating Underlying Gum Disease

If gum disease is the cause, treating it directly is essential. Treatment may include:

  • Regular cleanings
  • Periodontal therapy
  • Antibiotic treatments
  • Lifestyle changes
  • Frequent dental checkups

Treating the root cause helps stop further damage and supports long-term gum health.

How to Prevent Receding Gums

The good news is that gum recession is often preventable. With a few simple changes, you can keep your gums healthy for life.

1. Brush Gently and Properly

A common cause of recession is brushing too hard. Try these tips:

  • Use a soft-bristled brush
  • Apply light pressure
  • Brush for 2 minutes twice a day
  • Use small, circular motions
  • Replace your toothbrush every 3 months

Brushing harder doesn’t mean cleaner teeth. Gentle is best.

2. Floss Every Day

Daily flossing helps remove plaque between teeth where toothbrushes can’t reach. This:

  • Keeps gums healthy
  • Reduces inflammation
  • Prevents bacteria buildup
  • Improves overall oral hygiene
  • Supports long-term gum strength

Be gentle when flossing, especially around sensitive spots.

3. Visit Your Dentist Regularly

Routine dental visits help catch gum recession early. Most adults should:

  • Schedule a cleaning every 6 months
  • Have annual full check-ups
  • Get X-rays as recommended
  • Ask about any sensitivity or changes
  • Discuss your brushing habits

Early detection is the easiest way to prevent serious recession.

4. Avoid Tobacco Products

Smoking and chewing tobacco are major contributors to gum disease and recession. Quitting can:

  • Improve gum health
  • Reduce bad breath
  • Lower the risk of tooth loss
  • Improve healing
  • Boost overall health

It’s one of the best gifts you can give your smile.

5. Manage Stress

High stress can lead to teeth grinding and clenching, which damages gums. Try:

  • Deep breathing
  • Meditation
  • Exercise
  • Better sleep
  • A custom night guard if needed

A calm mind supports a healthy mouth.

6. Eat a Balanced Diet

Your gums need nutrients to stay healthy. Foods that support gum health include:

  • Leafy greens
  • Citrus fruits (in moderation)
  • Dairy products
  • Whole grains
  • Nuts and seeds
  • Plenty of water

Avoid too much sugar and processed foods, which feed harmful bacteria.

7. Watch for Early Warning Signs

If you notice symptoms like sensitivity, bleeding gums, or visible gum changes, don’t wait. Seeing your dentist early can save you from more advanced treatment later.

When to See a Dentist About Receding Gums

You should book a dental visit if you notice:

  • Teeth that look longer than usual
  • Bleeding when brushing or flossing
  • Sensitivity in certain teeth
  • Visible gum changes
  • Pain near the gumline
  • A loose or shifting tooth
  • Persistent bad breath
  • Pockets between gums and teeth

These can all be signs that your gums need professional attention.

Frequently Asked Questions

Can receding gums grow back?

No, gum tissue doesn’t grow back on its own. However, treatments like gum grafting and the Pinhole Surgical Technique can restore lost gum tissue and improve gum health.

Are receding gums always a sign of gum disease?

Not always. Gum recession can also be caused by aggressive brushing, genetics, grinding, or misaligned teeth. However, gum disease is one of the most common causes, so always get it checked.

Is gum recession painful?

It can be. Many people experience tooth sensitivity, soreness, and discomfort when eating or brushing. Treatment can help reduce pain and prevent further issues.

How long does it take to treat receding gums?

It depends on the severity. Mild cases can improve in weeks with better habits, while advanced cases may need surgical procedures that take several months to fully heal.

Can children get receding gums?

Yes, although it’s less common. Causes in children include aggressive brushing, gum disease, or misaligned teeth. Regular dental visits can catch and treat the issue early.

If you’re noticing the signs of receding gums or want to keep your smile healthy for life, the team at Ethos Modern Dental & Implant Center is here to help. Dr. Sreelakshmi Keesara offers gentle, personalized care to treat gum recession and protect your beautiful smile for years to come.

Top 15 Celebrities Who Use Invisalign: Famous Smiles Transformed by Clear Aligners

Have you ever looked at a celebrity’s perfect smile and wondered how they got it? Spoiler alert — many of them didn’t always have it. While some Hollywood stars are born with naturally straight teeth, a surprising number have used Invisalign to transform their smiles. From singers to actors and athletes, clear aligners have quietly become one of the most popular ways for celebrities to achieve a flawless, confident smile.

Here’s a closer look at 15 famous faces who have reportedly used Invisalign, why it’s so popular in Hollywood, and what makes it a great choice for everyday people too.

Why Celebrities Love Invisalign

Hollywood stars are always in the spotlight, which means they need a smile that looks great on camera and behind the scenes. Traditional metal braces aren’t always practical for them — and that’s where Invisalign comes in. Here’s why celebrities choose clear aligners over braces:

  • They are nearly invisible
  • They don’t interfere with talking or filming
  • They are removable for meals and events
  • They are more comfortable than metal braces
  • They produce results in less time for many cases
  • They allow easy oral hygiene
  • They offer flexibility for busy schedules

It’s no wonder Invisalign has become a go-to smile solution for stars all over the world.

Top 15 Celebrities Who Use or Have Used Invisalign

Below are 15 famous personalities who have reportedly used Invisalign to enhance their smiles. While many keep their dental treatments private, several have openly shared their experiences with clear aligners.

1. Tom Cruise

Yes, even Tom Cruise wore clear aligners. The Mission Impossible star reportedly used Invisalign to straighten his smile back when the technology first became popular. Photos of him with clear aligners during a press event went viral, making fans realize that even A-list stars use them too.

2. Justin Bieber

The pop star is known for his bright, perfect smile. According to multiple reports, Justin Bieber used Invisalign during his teenage years to perfect his teeth alignment.

3. Khloe Kardashian

Khloe has spoken openly about using Invisalign to improve her smile. As one of the most photographed reality stars in the world, having straight, confident teeth has always been a priority for her.

4. Oprah Winfrey

Even media icon Oprah Winfrey has used Invisalign. She reportedly chose clear aligners because they were discreet and easy to manage with her busy schedule.

5. Eva Longoria

The Desperate Housewives actress is another celebrity known for her stunning smile. She has shared on different occasions that Invisalign helped her achieve a more aligned and natural look.

6. Zac Efron

Zac Efron has been seen wearing clear aligners during interviews and behind the scenes. Many of his fans noticed the subtle change in his smile after he reportedly completed his Invisalign treatment.

7. Kendall Jenner

Kendall has casually shared her Invisalign journey on social media. The supermodel is no stranger to perfect appearances, and clear aligners helped her maintain a runway-ready smile.

8. Serena Williams

Tennis champion Serena Williams reportedly used Invisalign to refine her smile. Athletes love clear aligners because they don’t interfere with sports performance or eating habits.

9. Katherine Heigl

The actress has spoken about using Invisalign in interviews. Her ever-bright smile is one of her signature features, and Invisalign played a part in maintaining it.

10. Anna Kendrick

Anna Kendrick has shared on social media that she used Invisalign to fix minor alignment issues. The actress called the experience easy and stress-free.

11. Gisele Bundchen

Supermodel Gisele Bundchen is rumored to have used Invisalign to keep her smile in perfect shape. While she has not made a public statement, dental experts and stylists have hinted at her use of clear aligners.

12. Tom Brady

Reportedly, NFL legend Tom Brady also used Invisalign to enhance his smile. As a sports icon and brand ambassador, his image is everything, and Invisalign offered the discreet treatment he needed.

13. Justin Long

The actor has openly joked about wearing Invisalign in interviews. He shared that the experience was much easier than traditional braces and didn’t disrupt his on-camera work.

14. Faith Hill

Country music star Faith Hill is also said to have used Invisalign during her career. Her bright, even smile is one of her most recognized features.

15. Dakota Johnson

Although Dakota Johnson is famous for her unique tooth gap, she reportedly used Invisalign briefly for minor corrections. She chose to keep her gap, but Invisalign helped fine-tune the rest of her smile.

What Makes Invisalign So Popular?

It’s not just celebrities who love clear aligners. Millions of everyday people are choosing Invisalign over traditional braces. Here’s why this clear aligner treatment has become so popular.

1. Nearly Invisible Look

Invisalign aligners are made from clear plastic, making them barely noticeable. They’re ideal for adults and teens who don’t want the metallic look of braces.

2. Removable for Comfort

Unlike braces, you can remove Invisalign aligners when:

  • Eating or drinking
  • Brushing or flossing
  • Taking photos
  • Attending special events
  • Playing instruments

This flexibility is something braces simply can’t offer.

3. Less Painful Than Braces

Most patients say Invisalign feels gentler than metal braces. The smooth plastic doesn’t irritate the gums, cheeks, or tongue like traditional brackets and wires can.

4. Easier Oral Hygiene

Since you can take them out, brushing and flossing is much easier compared to braces. This helps prevent:

  • Cavities
  • Gum disease
  • Bad breath
  • Tooth staining
  • Plaque buildup

5. Faster Visible Results

Many Invisalign cases finish in about 6 to 18 months. Some patients see improvement in just a few weeks.

6. Fewer Office Visits

Invisalign typically requires fewer dentist visits than braces. Many patients only check in every 6 to 8 weeks.

7. Suitable for All Ages

Invisalign works for teens, adults, and even seniors. As long as the teeth and gums are healthy, age isn’t a barrier.

Common Issues Invisalign Can Fix

Invisalign isn’t just for celebrities — it’s also effective for many dental issues, including:

  • Crowded teeth
  • Crooked teeth
  • Gaps between teeth
  • Overbite
  • Underbite
  • Crossbite
  • Mild jaw alignment issues
  • Teeth shifting after braces

It’s a versatile treatment that can work for many smile concerns.

Should You Get Invisalign Like the Celebrities?

If you’ve been thinking about improving your smile, Invisalign might be the right choice for you. Here are some good signs that you may benefit:

  • You feel self-conscious about your smile
  • You don’t want metal braces
  • You have a busy lifestyle
  • You want faster results
  • You want better oral hygiene during treatment
  • You want a comfortable orthodontic option
  • You want to keep your treatment discreet

Many adults choose Invisalign because it fits into their professional and social lives without standing out.

What to Expect During Your Invisalign Journey

Here’s a simple overview of what the process looks like:

  1. A consultation with your dentist to check if you’re a good candidate
  2. A digital 3D scan of your teeth
  3. A personalized treatment plan
  4. Receiving your custom-made clear aligners
  5. Wearing each set for about 1 to 2 weeks
  6. Switching to new aligners as your teeth shift
  7. Regular checkups every 6 to 8 weeks
  8. Wearing a retainer after treatment to keep your smile straight

It’s a smooth, step-by-step process designed for comfort and results.

Tips for a Successful Invisalign Treatment

To get the best out of your Invisalign journey, follow these expert tips:

  • Wear your aligners 20 to 22 hours a day
  • Brush your teeth before putting them back in
  • Clean your aligners daily
  • Store them in their case when not in use
  • Avoid hot drinks while wearing them
  • Don’t chew gum with aligners in
  • Visit your dentist on schedule
  • Wear your retainer after treatment

A little consistency goes a long way in making your treatment a success.

Frequently Asked Questions

Is Invisalign as effective as braces?

Yes. For most cases, Invisalign works just as well as traditional braces. Severe orthodontic issues may still require braces, but mild to moderate cases respond very well to clear aligners.

How long does Invisalign take to work?

Most treatments take between 6 and 18 months. Mild cases can finish in as little as 3 to 6 months. Your dentist will give you a personalized timeline.

Are Invisalign aligners painful?

You may feel mild pressure when switching to a new set of aligners, but it’s much gentler than the discomfort of metal braces. The feeling usually fades within a day or two.

Can teens use Invisalign?

Yes. There’s even a special version called Invisalign Teen designed for younger patients. It includes features like compliance indicators to help track wear time.

How much does Invisalign cost?

The cost varies depending on the complexity of your case and your location. On average, treatment ranges from $3,000 to $7,500. Many dental offices offer flexible payment plans and insurance options.

If you’re inspired by these celebrity smiles and ready to transform your own, the team at Ethos Modern Dental & Implant Center is here to help. Dr. Sreelakshmi Keesara offers personalized Invisalign consultations to give you a confident, picture-perfect smile — without anyone even noticing your treatment.

Tooth Popping or Clicking Sensation? What It Means and How to Fix It

You’re chewing your favorite meal or yawning in the morning when suddenly — pop! Your jaw makes a strange noise, and you feel a clicking sensation near your teeth. It can be unsettling, especially when it happens often. If you’ve been experiencing a tooth popping or clicking sensation, you’re not alone. Many people deal with this, and the cause is usually something fixable.

Here’s a clear, easy-to-understand guide on what causes tooth and jaw clicking, what it means for your dental health, and how to fix it.

What Does a Tooth Popping or Clicking Sensation Feel Like?

It’s a strange feeling that can happen suddenly or off and on. People often describe it as:

  • A clicking sound when biting down
  • A popping noise when opening the mouth wide
  • A snapping feeling near the jaw
  • Pressure in the teeth when chewing
  • A grinding or shifting sensation
  • A locked feeling that releases with a “click”

You might hear it, feel it, or both. The cause could be related to your teeth, your jaw joints, or even your bite alignment.

What Causes Teeth to Pop or Click?

There are several possible reasons for these sensations. Some are minor, while others might need professional attention. Here are the most common causes.

1. TMJ Disorder (Temporomandibular Joint Disorder)

This is the most common reason for clicking or popping near the teeth. Your TMJ is the joint that connects your jaw to your skull. When something goes wrong with it, you might feel:

  • Clicking or popping when opening or closing your mouth
  • Jaw stiffness
  • Pain near the ears
  • Headaches
  • Difficulty chewing
  • A locked jaw

TMJ issues are often linked to stress, grinding, or bite problems.

2. Teeth Grinding or Clenching (Bruxism)

Many people grind their teeth without realizing it, especially at night. Over time, this can lead to:

  • Jaw soreness
  • Worn-down teeth
  • Clicking jaw movement
  • Cracked or chipped teeth
  • Headaches and ear pain
  • A shifting bite

A custom night guard can usually fix this.

3. Misaligned Bite

If your teeth don’t line up properly, you may feel clicking when chewing or biting. Bite misalignment can be caused by:

  • Crooked teeth
  • Missing teeth
  • Old fillings or crowns that changed your bite
  • Wisdom teeth growing in
  • Jaw injuries
  • Genetics

This can be corrected with clear aligners or other orthodontic treatments.

4. Cracked or Damaged Tooth

A small crack in a tooth can cause a popping or clicking sensation when chewing. Signs include:

  • Sharp pain when biting
  • Sensitivity to hot or cold
  • Pain that comes and goes
  • Discomfort near a single tooth
  • A clicking feel only when chewing certain foods

Cracked teeth need quick attention to prevent further damage.

5. Loose Fillings or Dental Work

If a filling, crown, or bridge becomes loose, it can shift slightly when you bite — causing a clicking or popping feeling.

You might also notice:

  • A sudden change in your bite
  • Sensitivity around the area
  • Pressure when chewing
  • Food getting stuck more often
  • A rough or uneven feeling

This usually requires a quick dental visit to fix.

6. Jaw Joint Inflammation

Sometimes, the cartilage or muscles in your jaw joint can become inflamed. This can cause:

  • Painful clicking
  • Limited mouth opening
  • Swelling near the ear
  • Soreness when chewing
  • A feeling that the jaw is “catching”

Causes include injury, arthritis, or repeated stress on the joint.

7. Stress and Muscle Tension

Stress doesn’t just affect your mind — it affects your jaw too. Many people unknowingly hold tension in their face and jaw, leading to:

  • Clenching teeth during the day
  • Grinding at night
  • Tight facial muscles
  • Frequent headaches
  • A clicking jaw

Managing stress can dramatically reduce these symptoms.

8. Wisdom Teeth Issues

If your wisdom teeth are coming in or pressing on other teeth, you may feel:

  • Clicking sensations in the back of your mouth
  • Pressure when biting
  • Jaw discomfort
  • Shifting teeth
  • Pain when opening your mouth

This often calls for an evaluation to see if removal is needed.

How to Fix a Tooth Popping or Clicking Sensation

Now that you know the possible causes, here’s how you can ease the discomfort and find relief.

1. See Your Dentist

This is the most important step. A dentist can:

  • Identify the exact cause
  • Check for cracks or loose dental work
  • Examine your bite and jaw alignment
  • Take X-rays of your jaw joint
  • Recommend the right treatment

Don’t ignore long-term clicking or popping — it usually doesn’t go away on its own.

2. Use a Night Guard

If grinding or clenching is the issue, a custom night guard can help by:

  • Cushioning your bite
  • Preventing tooth damage
  • Reducing jaw strain
  • Easing morning soreness
  • Stopping clicking caused by overuse

It’s one of the most effective and simple solutions.

3. Manage Stress

Stress is a major cause of jaw issues. Try these to keep your jaw relaxed:

  • Practice deep breathing
  • Try meditation or yoga
  • Take short walks during the day
  • Stretch your jaw gently
  • Sleep at least 7 to 8 hours
  • Avoid clenching your teeth when focused or stressed

A relaxed mind means a relaxed jaw.

4. Eat Soft Foods When Flare-Ups Happen

If your jaw is acting up, give it a break by eating softer foods like:

  • Mashed potatoes
  • Smoothies
  • Soup
  • Oatmeal
  • Eggs
  • Yogurt
  • Soft pasta

Avoid hard, crunchy, or chewy foods until the clicking calms down.

5. Apply Warm or Cold Compresses

Both warm and cold compresses can help with jaw discomfort.

How to use them:

  • Warm compress: relaxes muscles and improves blood flow
  • Cold compress: reduces swelling and numbs pain
  • Apply for 15 minutes at a time
  • Use several times a day
  • Never apply directly to the skin

Alternate between the two for best results.

6. Avoid Wide Mouth Movements

Avoid actions that strain your jaw, such as:

  • Yawning widely
  • Chewing gum
  • Biting nails
  • Eating large bites
  • Resting your face on your hand
  • Talking for long periods without breaks

Small changes can take pressure off your jaw and reduce clicking.

7. Try Gentle Jaw Exercises

Some exercises can strengthen and relax your jaw muscles. Try:

  • Opening and closing your mouth slowly
  • Moving your jaw side to side
  • Pressing your tongue gently against the roof of your mouth
  • Stretching your jaw forward and backward
  • Massaging the muscles near your jaw

Only do these if they don’t cause pain.

8. Get Treatment for Bite or Tooth Issues

If your popping is caused by misalignment or a damaged tooth, your dentist may recommend:

  • Clear aligners to fix bite issues
  • Crowns or bonding for cracked teeth
  • Replacement of old dental work
  • Tooth extraction for problematic wisdom teeth
  • Bite adjustments for uneven pressure

These solutions target the root cause rather than just the symptoms.

Signs You Should See a Dentist Right Away

While occasional clicking is usually harmless, you should book a visit if you notice:

  • Pain that doesn’t go away
  • A locked jaw
  • Frequent or loud popping
  • Difficulty chewing
  • Earache or facial pain
  • Swelling near the jaw joint
  • A sudden change in your bite

These could be signs of a more serious dental or jaw issue that needs treatment.

How to Prevent Tooth and Jaw Clicking

You can lower your chances of jaw issues with simple daily habits:

  • Sleep on your back instead of your stomach
  • Manage stress levels
  • Avoid chewing on hard objects like pens
  • Limit gum chewing
  • Maintain good posture
  • Stay hydrated
  • Keep regular dental checkups
  • Use a mouthguard if you grind your teeth

Small steps go a long way in protecting your jaw.

When Clicking Is Considered Normal

Sometimes, a small click here and there is just part of your jaw’s normal movement — especially if there’s no pain. It may happen because of:

  • Mild muscle tension
  • Slight cartilage shifts
  • Quick movements like wide yawning
  • Eating something tough or crunchy
  • Stress that has passed quickly

If the clicking is rare and painless, it usually doesn’t need treatment.

Frequently Asked Questions

Is a clicking jaw serious?

It can be, depending on the cause. Occasional clicking with no pain isn’t usually serious. But if it’s frequent, painful, or paired with other symptoms, it’s worth seeing a dentist.

Can clicking teeth go away on its own?

Sometimes, especially if it’s caused by short-term stress or a temporary muscle issue. However, if it lasts more than a few weeks or worsens, professional care is recommended.

Does grinding teeth cause jaw clicking?

Yes. Teeth grinding puts extra pressure on your jaw joint, which can lead to clicking, popping, or even pain over time. A custom night guard can help prevent this.

Can a dentist fix a popping jaw?

Yes. Depending on the cause, your dentist may recommend a night guard, bite adjustment, dental work, or referral to a TMJ specialist for advanced treatment.

Can stress really cause a clicking sensation in my teeth?

Absolutely. Stress causes muscle tension and jaw clenching, both of which can lead to clicking sensations. Managing stress can significantly reduce these symptoms.

If you’re experiencing a tooth popping or clicking sensation, don’t ignore it. Book a visit with Dr. Sreelakshmi Keesara at Ethos Modern Dental & Implant Center for a gentle evaluation and the right treatment to help you smile, eat, and live comfortably again.


Popular Services:

Emergency Dentist Edinburg TX | Dental Implants in Edinburg TX | Root Canal Treatment | Dental Crowns, Veneers & Bridges Edinburg TX |

We’re Near From 

Dentist in McAllen TX | Emergency Dentist McAllen TX | Pediatric Dentist McAllen TX | Dental Implants in McAllen, TX | Teeth Whitening McAllen TX | Root Canal Treatment in McAllen TX | Dental Crowns, Veneers & Bridges McAllen TX |

Dentist in Pharr TX | Dentist in Mission TX | Dentist in Weslaco TX | Dentist in Palmview TX | Dentist in San Juan TX | Dentist in Donna TX |

Can You Sleep With Dentures In? 10 Dentist-Recommended Tips

Wearing dentures can feel like a brand-new start — you can smile, chew, and talk with confidence again. But once bedtime rolls around, a common question comes up: should you sleep with your dentures in, or take them out? It’s one of the most asked questions among new and long-time denture wearers, and the answer might surprise you.

Here’s a clear, dentist-approved guide on whether you can sleep in dentures, what the risks are, and 10 simple tips to keep your mouth and dentures in top shape.

Can You Sleep With Dentures In?

The short answer is — yes, you technically can, but dentists strongly recommend that you don’t. Sleeping with your dentures in night after night can lead to several health and hygiene issues over time.

While it may feel comfortable or convenient to keep them in, your mouth needs a break — just like your body does after a long day. Removing your dentures while you sleep gives your gums time to rest, heal, and stay healthy.

Why Dentists Say Don’t Sleep With Dentures In

Sleeping in dentures may seem harmless, but it can lead to a number of problems. Here’s why your dentist recommends taking them out at night.

1. It Increases the Risk of Gum Disease

When dentures stay in your mouth 24/7, your gums don’t get the chance to breathe. This can lead to:

  • Swollen and irritated gums
  • Bacteria buildup under the dentures
  • Higher risk of gum infection
  • Bad breath
  • Bleeding gums

2. It Can Cause Bone Loss

Your jawbone needs natural stimulation to stay strong. Wearing dentures all day and night puts constant pressure on the bone, which can lead to:

  • Faster bone shrinkage
  • Looser dentures over time
  • Change in facial shape
  • Difficulty wearing dentures comfortably
  • More frequent denture adjustments or replacements

3. It Promotes Bacterial and Fungal Growth

A warm, moist mouth covered by dentures is the perfect environment for bacteria and yeast to grow. This can cause:

  • Oral thrush (a white, painful infection)
  • Bad breath
  • Mouth sores
  • Inflammation under the dentures
  • Skin irritation around the lips

4. It Can Lead to Denture Stomatitis

This is one of the most common problems for people who sleep in their dentures. Signs include:

  • Red, irritated areas on the roof of your mouth
  • Soreness when wearing dentures
  • A burning feeling in your mouth
  • White patches on the tongue or palate
  • Discomfort while eating

5. It Increases the Risk of Pneumonia

Studies have shown that older adults who sleep with their dentures in are more likely to develop pneumonia. This is because bacteria from the mouth can be inhaled into the lungs during sleep.

When It Might Be Okay to Sleep With Dentures In

There are a few short-term situations where keeping your dentures in overnight is acceptable. These include:

  • The first 24 hours after getting new dentures (as instructed by your dentist)
  • Traveling or sleeping over somewhere without proper denture care supplies
  • Emotional comfort during the early days of adjustment

Even then, it’s only a short-term solution. Long-term overnight wear is not recommended.

10 Dentist-Recommended Tips for Sleeping Comfortably Without Dentures

Taking out your dentures at night doesn’t have to feel uncomfortable. With the right routine, you can sleep peacefully and wake up with a healthier smile. Here are 10 tips dentists recommend.

1. Remove Your Dentures Before Bed

Start a habit of taking out your dentures every night. This:

  • Gives your gums a chance to recover
  • Reduces the risk of infections
  • Keeps your dentures in better shape
  • Helps prevent bad breath
  • Improves the lifespan of your dentures

Make it a regular part of your bedtime routine.

2. Clean Your Dentures Thoroughly

Before storing them, give your dentures a proper clean.

How to do it right:

  • Rinse them under warm water (not hot)
  • Use a soft denture brush, not a regular toothbrush
  • Clean with a denture cleanser or mild soap
  • Avoid toothpaste, which can be too abrasive
  • Pay attention to grooves and clasps

Cleaning daily keeps your dentures fresh and stain-free.

3. Soak Dentures Overnight

Most dentures need to stay moist to keep their shape. Store them in:

  • A glass of cool water
  • A denture-cleansing solution
  • A dentist-recommended soaking liquid

Never let your dentures dry out, as this can cause them to warp or crack.

4. Brush Your Gums, Tongue, and Palate

Even without natural teeth, your mouth still needs daily care. Use a soft toothbrush or a damp cloth to gently clean:

  • Your gums
  • Your tongue
  • The roof of your mouth
  • Your cheeks

This boosts circulation, removes bacteria, and improves breath.

5. Rinse Your Mouth Before Sleeping

A nightly rinse can help reduce bacteria and keep your mouth feeling clean. Try:

  • Warm salt water
  • A non-alcoholic mouthwash
  • A dentist-recommended antimicrobial rinse

This is especially helpful if you have any sore spots or irritation.

6. Use a Denture Container

Keep your dentures safe overnight by using a proper denture container. This:

  • Protects them from damage
  • Prevents drying out
  • Keeps them away from pets and curious children
  • Makes them easier to clean
  • Reduces the risk of accidentally losing them

Always rinse the container daily to prevent bacteria buildup.

7. Massage Your Gums

Gentle gum massage can help with comfort and circulation. Try this:

  • Use a clean finger or soft cloth
  • Massage in small, circular motions
  • Spend 1 to 2 minutes per area
  • Be gentle and relaxed
  • Avoid pressing too hard

Many denture wearers find this soothing before bed.

8. Stay Hydrated

Drinking water throughout the day helps prevent dry mouth, which can worsen denture discomfort. Stay hydrated to:

  • Keep saliva levels healthy
  • Reduce gum irritation
  • Maintain a fresh-tasting mouth
  • Lower the risk of bad breath
  • Support smoother denture wear during the day

Avoid sugary drinks and limit coffee or alcohol before bed.

9. Watch for Signs of Trouble

Pay attention to your mouth every day. See your dentist if you notice:

  • Persistent soreness or redness
  • White patches on your tongue or gums
  • A burning feeling in your mouth
  • Dentures that feel loose
  • Difficulty chewing or speaking

Catching small issues early helps prevent bigger problems.

10. Visit Your Dentist Regularly

Even with dentures, regular dental visits are essential. Your dentist can:

  • Check the fit of your dentures
  • Adjust them as your mouth changes
  • Look for early signs of infection or bone loss
  • Provide professional cleanings
  • Offer denture relining or replacements when needed

Most denture wearers should see their dentist at least once a year.

Tips for First-Time Denture Wearers at Night

If you’re new to dentures, the first few nights can feel strange. Don’t worry — it gets easier. Try these tips:

  • Wear them for short periods at first
  • Practice removing and inserting them daily
  • Read or watch TV with them in to get used to the feel
  • Drink water to ease dryness
  • Speak out loud to build confidence with pronunciation
  • Be patient — your mouth needs time to adjust

It typically takes a few weeks to feel completely comfortable.

Signs Your Dentures Might Need Adjusting

If you’re struggling with overnight removal, sometimes it’s because the dentures don’t fit quite right during the day. Visit your dentist if you experience:

  • Dentures slipping while talking or eating
  • Pressure spots or sore areas
  • A change in your bite
  • Difficulty chewing certain foods
  • Dentures feeling loose suddenly

A small adjustment can make a big difference in comfort and confidence.

Frequently Asked Questions

Can I sleep with dentures in just sometimes?

It’s okay to keep them in for short-term situations, like traveling. But long-term nightly wear can harm your gums, bone, and overall mouth health.

How long should dentures soak overnight?

Most dentures should soak for at least 6 to 8 hours overnight to stay clean and keep their shape. Always use cool water or a denture-safe solution.

What happens if I accidentally fall asleep with my dentures in?

A single night of sleeping in your dentures isn’t dangerous. Just take them out, clean them well in the morning, and rinse your mouth thoroughly. Try not to make it a habit.

How do I keep my mouth from feeling dry when I take my dentures out?

Drinking enough water, using a humidifier in your bedroom, and rinsing your mouth before bed can help reduce dryness. If dry mouth continues, talk to your dentist about a saliva-replacement product.

How often should I replace my dentures?

On average, dentures last 5 to 10 years, depending on use and care. Regular dental visits help you know when it’s time for relining, adjustments, or a new set.

If you wear dentures or are thinking about getting them, the team at Ethos Modern Dental & Implant Center is here to help. Dr. Sreelakshmi Keesara provides expert, comfortable denture care that helps you sleep better, eat better, and smile with confidence every day.

Can You Eat Donuts After Wisdom Teeth Removal? Top 10 Safe Foods to Eat During Recovery

Just got your wisdom teeth pulled and craving something soft, sweet, and satisfying? You’re definitely not alone. Donuts are one of the most common foods people wonder about during recovery. They’re soft, easy to bite into, and feel like the perfect comfort food after a stressful dental procedure. But before you grab one — is it actually safe to eat donuts after wisdom teeth removal?

Here’s a clear, dentist-approved guide to whether donuts are a good idea after surgery, what to avoid, and the top 10 safe foods you can enjoy while you heal.

Can You Eat Donuts After Wisdom Teeth Removal?

The short answer is — not right away. While donuts are soft, they’re not the best choice in the first few days after wisdom teeth surgery. Here’s why:

  • They contain a lot of sugar, which can slow healing
  • Glazed donuts can stick to the extraction site
  • Crumbs may get stuck in the empty socket
  • Some donuts have hard or chewy pieces
  • The sugar can encourage bacteria growth
  • They can disturb the blood clot that protects your healing wound

If you really love donuts, the good news is — you can usually enjoy them again after about a week, depending on how well you’re healing.

When Can You Eat Donuts After Wisdom Teeth Removal?

Most dentists recommend waiting at least 5 to 7 days before eating donuts. By then, the initial healing is well underway and the risk of complications is much lower. Here’s a general timeline:

  • Day 1 to 2: Stick to cold, soft foods only
  • Day 3 to 4: Add warm soft foods that need little chewing
  • Day 5 to 7: Try soft, low-sugar foods if you’re healing well
  • After Day 7: You can start enjoying donuts in small bites

When you do try a donut, choose plain, soft, non-glazed ones first. Avoid any with nuts, hard toppings, or chewy fillings.

Why Diet Matters After Wisdom Teeth Removal

What you eat in the first week of recovery plays a huge role in how quickly and smoothly you heal. The right foods can:

  • Reduce swelling and discomfort
  • Prevent dry socket
  • Lower the risk of infection
  • Keep your energy up
  • Support faster tissue repair
  • Make you feel more comfortable overall

Eating the wrong foods, on the other hand, can lead to pain, delayed healing, or even a return trip to the dentist.

Foods to Avoid After Wisdom Teeth Surgery

Before we dive into the safe foods, here’s what to skip during your recovery:

  • Hard or crunchy foods like chips and popcorn
  • Sticky foods like caramel and gummies
  • Spicy foods that can irritate the wound
  • Acidic foods like citrus and tomato sauce
  • Tiny seeds or grains that can get stuck
  • Hot drinks like coffee and tea (for the first few days)
  • Carbonated and alcoholic beverages
  • Anything that requires using a straw

Straws are especially important to avoid. The suction can pull out the blood clot and lead to a painful condition called dry socket.

Top 10 Safe Foods to Eat During Wisdom Teeth Recovery

Now for the part you’ve been waiting for — what you can safely enjoy while you heal. These foods are gentle, nourishing, and easy to eat without disturbing your healing gums.

1. Mashed Potatoes

A classic favorite for a reason — mashed potatoes are smooth, filling, and easy to eat with a spoon.

Tips:

  • Make sure they’re not too hot
  • Avoid chunky pieces or skin
  • Add butter for flavor and softness
  • Mix in some bone broth for added nutrients
  • Try sweet potato for variety

2. Smoothies

Smoothies are perfect because they’re cold, soothing, and packed with nutrients. Just remember — no straws!

Best ingredients:

  • Bananas
  • Berries
  • Yogurt
  • Almond or oat milk
  • Spinach or kale (for added vitamins)

Drink slowly from a cup or spoon.

3. Yogurt

Yogurt is gentle on your mouth and great for your gut health, which supports healing.

Best options:

  • Plain Greek yogurt
  • Vanilla yogurt without chunks
  • Probiotic-rich varieties
  • Cold but not freezing

Skip yogurts with seeds, granola, or fruit chunks.

4. Scrambled Eggs

Eggs are soft, protein-packed, and one of the most recommended post-surgery foods.

How to make them perfect:

  • Cook them on low heat
  • Add a splash of milk for fluffiness
  • Avoid pepper or hard seasonings
  • Try cheesy scrambled eggs for variety
  • Eat them slightly warm, not hot

5. Applesauce

Applesauce gives you the comfort of fruit without the need to bite or chew.

Why it works:

  • Smooth and easy to swallow
  • Naturally sweet
  • Cold or room temperature is best
  • Gentle on the stomach
  • Available in single-serve cups for convenience

6. Mashed Avocado

Avocado is creamy, nutrient-rich, and full of healthy fats that help your body heal.

Try it:

  • Plain with a pinch of salt
  • Mashed on a piece of soft bread (after day 4)
  • Mixed into yogurt
  • Combined with mashed banana
  • As guacamole without spices

7. Soup (Lukewarm, Not Hot)

Soup is filling and nourishing — but it must be lukewarm, not hot, to avoid hurting the surgical area.

Best types:

  • Tomato soup (after day 3)
  • Chicken broth
  • Pumpkin soup
  • Butternut squash soup
  • Lentil soup (blended smooth)

Avoid soups with chunks of meat or vegetables.

8. Pudding and Jell-O

A sweet, soothing treat that’s easy to enjoy and doesn’t require chewing.

Why it’s great:

  • Cool and calming for your gums
  • Easy to swallow
  • Light on your stomach
  • Available in many flavors
  • Helps satisfy sweet cravings until you can eat donuts

9. Oatmeal

Once you’re past day 2 or 3, soft cooked oatmeal is a fantastic option.

Tips:

  • Cook it longer for a softer texture
  • Avoid steel-cut oats early on
  • Skip toppings like nuts or seeds
  • Add mashed banana or honey for sweetness
  • Eat it warm, not hot

10. Soft Pancakes (After Day 4)

Pancakes can be a comforting treat once you’re a few days into recovery.

Best approach:

  • Cook them soft and fluffy
  • Cut them into small bites
  • Top with syrup or applesauce, not butter chunks
  • Skip pancakes with nuts or fruits
  • Eat slowly and chew gently on the unaffected side

Tips for Eating After Wisdom Teeth Removal

To make recovery easier and protect your healing gums:

  • Chew on the side opposite to your extraction site
  • Eat slowly and in small bites
  • Stay hydrated with plenty of water
  • Rinse your mouth gently after meals
  • Avoid talking or laughing while eating
  • Keep your food at lukewarm or cool temperatures
  • Listen to your body — if it hurts, stop

These simple habits go a long way in keeping your recovery smooth and pain-free.

Signs Something’s Wrong After Eating

Sometimes food can cause issues during healing. Watch out for:

  • Sudden sharp pain after eating
  • Visible food stuck in the socket
  • A bad taste or smell
  • Bleeding that won’t stop
  • Increasing swelling
  • A throbbing pain that gets worse over time

If you notice any of these, contact your dentist right away.

What to Do If You Accidentally Eat Something You Shouldn’t

If you bit into a donut or another food too early, don’t panic. Here’s what to do:

  • Rinse your mouth gently with warm salt water
  • Avoid poking the area with your tongue or fingers
  • Eat softer foods for the next 24 hours
  • Take your pain medication if needed
  • Watch for signs of complications
  • Call your dentist if you feel pain or swelling

Most of the time, a small mistake won’t cause major issues — but staying cautious helps you heal faster.

When You Can Get Back to Eating Normal Foods

Most people can return to a normal diet 1 to 2 weeks after wisdom tooth removal, depending on:

  • The number of teeth removed
  • Whether stitches were used
  • How well you followed aftercare instructions
  • Your overall healing process

Always confirm with your dentist before going back to a regular diet.

Frequently Asked Questions

Can I eat soft donuts after wisdom teeth removal?

Even soft donuts are not safe to eat in the first few days because of their sugar content and sticky texture. Wait at least 5 to 7 days, and choose plain, non-glazed donuts when you do.

Why are sticky foods bad after wisdom teeth removal?

Sticky foods like donut glaze, caramel, or candy can pull at the blood clot and increase your risk of dry socket — one of the most painful post-surgery complications.

When can I drink coffee or tea after wisdom teeth removal?

Avoid hot drinks for the first 2 to 3 days. Once the initial swelling goes down, you can sip warm (not hot) drinks slowly. Avoid using straws during this time.

Can I eat ice cream after wisdom teeth removal?

Yes, but go for plain flavors without nuts, chunks, or hard candy. Cold ice cream can actually help soothe swelling — just eat it slowly with a spoon.

How long should I follow a soft food diet after wisdom teeth removal?

Most people need to follow a soft food diet for about 7 to 10 days. Always listen to your body and ease back into harder foods only when chewing no longer causes pain.

If you’re recovering from wisdom teeth removal and have questions about your healing or diet, the team at Ethos Modern Dental & Implant Center is here to help. Dr. Sreelakshmi Keesara provides expert, gentle care that supports a smooth recovery — so you can enjoy your favorite foods again with confidence.

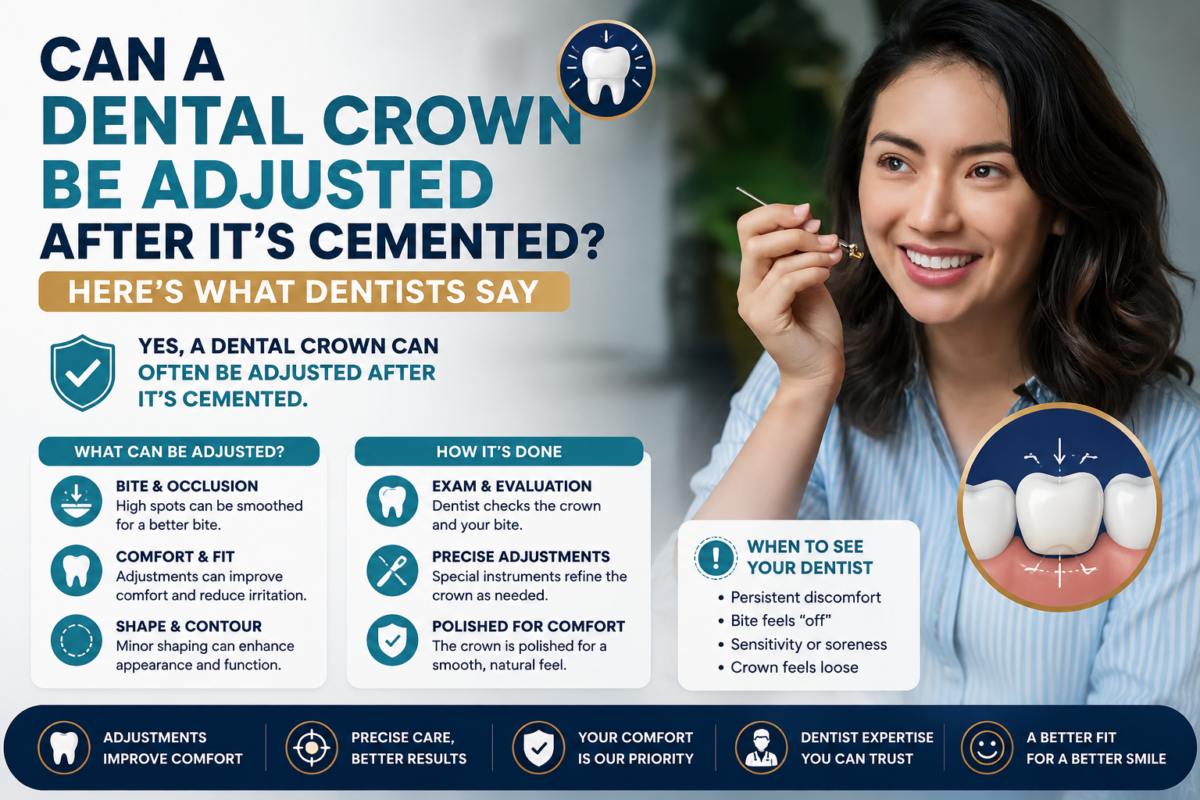
Can a Dental Crown Be Adjusted After It’s Cemented? Here’s What Dentists Say

You just got a new dental crown and walked out of the office excited to enjoy your restored smile. But after a few hours or days, something feels off. Maybe your bite feels uneven, the crown feels too tall, or there’s a strange pressure when you chew. Now you’re wondering — can a dental crown be adjusted after it’s cemented?

The good news is yes, it usually can. Dentists adjust cemented crowns more often than you might think. Here’s a clear, honest look at how it works, what to expect, and when to call your dentist for a quick fix.

What Does It Mean to “Adjust” a Crown?

Adjusting a crown means making small changes to its shape, height, or surface after it has already been bonded to your tooth. The goal is to make sure the crown:

  • Fits your bite comfortably
  • Doesn’t feel too tall or short
  • Lines up properly with your other teeth
  • Allows you to chew without pressure or pain
  • Feels natural in your mouth

These adjustments are usually small, painless, and done in one short visit.

Can a Crown Be Adjusted After It’s Cemented? The Short Answer

Yes — most crowns can be adjusted even after they’re cemented. Dentists use special tools to smooth, reshape, or trim the surface of the crown without removing it from your tooth.

What’s usually possible:

  • Lowering the height of a tall crown
  • Smoothing rough edges
  • Adjusting the bite or chewing surface
  • Polishing the surface for better feel
  • Reshaping the contact points between teeth

What’s harder to do:

  • Major shape changes
  • Changing the color
  • Fixing internal fit issues
  • Adjustments to crowns that are already cracked

If the crown has a serious problem, it may need to be replaced instead of adjusted.

Common Reasons a Cemented Crown Might Need Adjusting

A new crown can feel different at first — that’s normal. But sometimes the issue doesn’t go away on its own. Here are the most common reasons dentists need to adjust a cemented crown.

1. The Crown Feels Too Tall

This is the most common reason for adjustment. If the crown sticks up higher than your other teeth, it can:

  • Make your bite feel uneven
  • Cause jaw soreness
  • Lead to headaches
  • Put pressure on the new tooth
  • Cause discomfort when chewing

A quick polish or grind can usually fix this in minutes.

2. Your Bite Feels Off

Sometimes the crown is the right height but doesn’t line up perfectly with your bite. You might notice:

  • Hitting one tooth before the others when biting
  • Discomfort when chewing certain foods
  • A clicking or popping sensation
  • Tooth pain on the same side
  • Shifting jaw alignment

Your dentist can correct this with a bite adjustment.

3. The Crown Has Sharp or Rough Edges

A rough crown can irritate your tongue, cheeks, or gums. Adjusting it can help if you notice:

  • A scratchy feeling in your mouth
  • Sores or cuts on the cheek or tongue
  • Food getting trapped near the crown
  • Floss snagging on the edge
  • Plaque buildup along the crown line

A smoothing and polishing usually solves this quickly.

4. Sensitivity or Pain After the Crown Is Placed

Some sensitivity is normal in the first few days. But if it lingers, it could mean:

  • The bite is slightly off
  • The crown is pressing on a nerve
  • There’s irritation from cement leftover
  • The crown is too tight against another tooth
  • A deeper issue with the tooth underneath

Your dentist can usually fix this with a small adjustment — but in some cases, further treatment may be needed.

5. The Crown Doesn’t Look or Feel Natural

If the crown feels bulky, oddly shaped, or affects your speech, adjustments can help with:

  • Smoothing the chewing surface
  • Refining the side edges
  • Improving how it touches neighboring teeth
  • Reshaping the biting points
  • Making the surface less noticeable to your tongue

These small tweaks can make a big difference in comfort.

How Dentists Adjust a Cemented Crown

You don’t need to be nervous about a crown adjustment. It’s a quick and gentle process that doesn’t usually require numbing.

Here’s what to expect at your visit:

  1. Your dentist will check your bite using thin colored paper
  2. They will identify high spots or uneven areas
  3. A small dental tool is used to smooth or trim the crown
  4. Your bite is re-tested several times for accuracy
  5. The crown is polished to make it smooth again
  6. You’ll bite, chew, and check the comfort yourself

Most adjustments take just 10 to 20 minutes.

Is Adjusting a Crown Painful?

Not at all. Crown adjustments are usually painless because:

  • The dentist works only on the surface of the crown
  • No drilling into the tooth is needed
  • No anesthesia is usually required
  • The process is fast and minimally invasive
  • You can return to your day right after

If your tooth is sensitive, your dentist may use mild anesthetic, but most people don’t need it.

What If My Crown Can’t Be Adjusted?

In a few cases, a crown may be too damaged or poorly fitted to adjust. Your dentist may recommend replacing it if:

  • The crown is cracked or broken
  • The fit is too loose or too tight
  • There’s decay underneath
  • The shape can’t be safely modified
  • It doesn’t match your other teeth in color or contour

Replacing a crown isn’t ideal, but it’s a permanent solution that ensures lasting comfort and function.

How Long Should I Wait Before Asking for an Adjustment?

It’s normal for a new crown to feel a little different for the first few days. But you shouldn’t suffer through discomfort.

General guidelines:

  • Mild sensitivity is normal for up to 2 weeks
  • Bite issues should be reported within a few days
  • Sharp pain or pressure deserves an immediate call
  • Persistent jaw discomfort means it’s time for an adjustment
  • Anything that affects your daily life should be checked

Your dentist would much rather see you sooner than later.

Tips to Take Care of Your Crown After Adjustment

Once your crown is adjusted, follow these simple steps to keep it in great shape:

  • Brush twice a day with fluoride toothpaste
  • Floss carefully around the crown
  • Avoid chewing on hard foods like ice or nuts
  • Don’t bite directly on sticky candies
  • Wear a night guard if you grind your teeth
  • Get regular dental cleanings every 6 months
  • Watch for any new bite changes

With good care, a well-fitted crown can last 10 to 15 years or more.

When to See Your Dentist Right Away

Some symptoms shouldn’t wait. Call your dentist immediately if you notice:

  • Severe pain in or around the crown
  • A crown that feels loose or shifts when you bite
  • Pus, swelling, or bad taste near the tooth
  • Visible cracks on the crown
  • Bleeding gums around the crown area
  • Difficulty chewing on that side of your mouth

These could be signs of infection, decay, or a poorly fitted crown that needs attention.

Frequently Asked Questions

How long does it take to adjust a cemented crown?

Most crown adjustments take only 10 to 20 minutes. They’re quick, painless, and usually don’t require any numbing.

Will adjusting my crown weaken it?

No. Dentists use precise techniques and tools that smooth or reshape the surface without harming the structure of the crown.

Can I adjust my crown at home?

Never try to adjust a crown yourself. DIY adjustments can damage the crown, your tooth, or your bite. Always see a dentist for professional adjustments.

Why does my new crown feel taller than my other teeth?

Even a tiny difference in crown height can feel huge in your mouth because your bite is extremely sensitive. A quick adjustment can fix this completely.

What if my bite still feels off after the adjustment?

Sometimes more than one visit is needed to fine-tune the fit. If your bite still feels off after an adjustment, schedule a follow-up so your dentist can refine it further.

If your dental crown feels off or uncomfortable after being cemented, you don’t have to live with it. Book a visit with Dr. Sreelakshmi Keesara at Ethos Modern Dental & Implant Center for a quick, gentle adjustment that gets your bite — and your smile — feeling just right.


Popular Services:

Emergency Dentist Edinburg TX | Dental Implants in Edinburg TX | Root Canal Treatment | Dental Crowns, Veneers & Bridges Edinburg TX |

We’re Near From 

Dentist in McAllen TX | Emergency Dentist McAllen TX | Pediatric Dentist McAllen TX | Dental Implants in McAllen, TX | Teeth Whitening McAllen TX | Root Canal Treatment in McAllen TX | Dental Crowns, Veneers & Bridges McAllen TX |

Dentist in Pharr TX | Dentist in Mission TX | Dentist in Weslaco TX | Dentist in Palmview TX | Dentist in San Juan TX | Dentist in Donna TX |

Why Do My Teeth Ache After Running? Causes, Fixes & When to See a Dentist

You just finished a great run — your heart is pumping, your legs are tired, and then out of nowhere, your teeth start to ache. Strange, right? You’re not imagining it, and you’re definitely not alone. Many runners and athletes experience tooth pain during or after running, and it can be confusing if you don’t know why it’s happening.

The good news is, most causes of tooth pain after running are manageable once you understand what’s going on. Here’s a complete guide to why your teeth ache after running, how to fix it, and when it’s time to see a dentist.

Is It Normal to Have Tooth Pain After Running?

A little discomfort here and there is more common than you might think — but it’s not something you should ignore. Tooth pain after exercise can be a sign that something is happening in your mouth, your sinuses, or even your overall health. The pain may feel:

  • Sharp and sudden
  • Dull and throbbing
  • Like pressure in your upper teeth
  • Sensitive to cold air
  • Worse during or right after the run
  • Better after rest and water

The type of pain you feel can actually help point to the cause.

Common Reasons Your Teeth Ache After Running

There are several possible reasons for tooth pain after running. Some are minor and easy to fix, while others may need professional care.

1. Sinus Pressure

This is by far the most common cause of tooth pain after running. Your sinuses sit right above your upper teeth, and when they get inflamed or filled with pressure, it can feel like your teeth are aching.

This happens because:

  • Running increases blood flow and pressure in your head
  • Cold air can irritate the sinuses
  • Allergies or congestion make sinuses more sensitive
  • Pollen and dust during outdoor runs can inflame the sinuses
  • Sinus infections cause referred pain to the upper teeth

If your pain is mostly in your upper back teeth, sinus pressure is likely the cause.

2. Cold Air Sensitivity

Running outdoors in cold weather can make your teeth ache, especially if you breathe through your mouth.

Cold air can:

  • Trigger sensitive nerves in exposed dentin
  • Cause sudden temperature shifts in your mouth
  • Make existing tooth issues feel worse
  • Cause sharp pain in teeth with thin enamel
  • Affect teeth with old fillings or crowns

This kind of pain usually disappears soon after you get inside.

3. Teeth Grinding or Clenching During Running

Many runners clench their jaw without even realizing it. Over time, this can lead to:

  • Sore teeth and jaw
  • Pain when biting down
  • Headaches after running
  • Cracks in teeth from pressure
  • Worn down enamel

If you finish a run with tight jaw muscles, this could be the culprit.

4. Dehydration and Dry Mouth

When you run, you lose fluids quickly. A dry mouth doesn’t have enough saliva to protect your teeth, which can lead to:

  • Increased tooth sensitivity
  • Bacterial buildup near the gumline
  • Inflammation in the gums
  • Cracked or sore tongue and cheeks
  • Stronger tooth pain after exercise

Staying hydrated before, during, and after running can prevent this.

5. Hidden Cavities or Dental Issues

Sometimes, running just brings out tooth pain you already had — you just didn’t notice it during your regular day. Increased blood flow and pressure during exercise can make these issues more noticeable.

Common hidden problems include:

  • Small cavities
  • Cracked teeth
  • Gum infections
  • Old fillings starting to fail
  • Early signs of root canal issues

If your pain happens regularly with exercise, this might be the reason.

6. Sports Drinks and Energy Gels

What you eat and drink during your runs can also affect your teeth. Many sports drinks and energy gels are:

  • High in sugar
  • Highly acidic
  • Sticky on teeth
  • Damaging to enamel
  • Linked to higher cavity risk

This combination can lead to sensitivity and pain over time.

7. Heart-Related Tooth Pain (Rare but Important)

In rare cases, tooth pain during exercise may be linked to your heart. This is called referred pain, and it can sometimes be a sign of:

  • Angina
  • Heart artery blockage
  • Cardiovascular issues

This usually affects the lower jaw and may come with shortness of breath, chest pressure, or sweating. If you ever experience this, stop running and seek medical help right away.

How to Fix Tooth Pain After Running

Now that you know why your teeth might ache, here are simple ways to manage and prevent the pain.

Stay Properly Hydrated

Drink plenty of water before, during, and after your run. This keeps your mouth moist and protects your teeth.

Tips for runners:

  • Sip water every 15 to 20 minutes
  • Avoid sugary sports drinks when possible
  • Carry a water bottle on long runs
  • Rinse your mouth with water if you eat energy gels
  • Add electrolytes if you sweat a lot

Breathe Through Your Nose When Possible

Breathing through your nose helps:

  • Filter out cold air
  • Reduce sinus pressure
  • Protect tooth sensitivity
  • Improve oxygen intake
  • Lower your risk of dry mouth

It can take practice, but it’s worth the effort.

Use a Mouthguard If You Clench

If you grind or clench your teeth while running, a custom mouthguard can:

  • Protect your enamel
  • Reduce jaw pain
  • Cushion your bite
  • Prevent cracks in teeth
  • Improve your overall comfort

Talk to your dentist about getting a sports-friendly guard.

Treat Sinus Issues

If sinus pressure is your main problem, try:

  • Saline nasal sprays before running
  • Antihistamines for allergies
  • Warm showers before going out in cold weather
  • Avoiding high-pollen days
  • Staying hydrated

If sinus issues persist, see a doctor — chronic sinusitis can cause repeated tooth pain.

Rinse Your Mouth After Sports Drinks

If you must use sports drinks or gels, protect your teeth by:

  • Rinsing with water after each use
  • Waiting 30 minutes before brushing
  • Limiting how often you consume them
  • Using a straw when possible
  • Choosing lower-sugar options

This helps reduce enamel erosion and tooth pain.

Visit Your Dentist Regularly

Routine checkups can catch issues like cavities, cracks, or grinding before they become painful. Most dentists recommend a checkup every 6 months.

When to See a Dentist for Tooth Pain After Running

Sometimes, home remedies aren’t enough. You should visit a dentist if:

  • The pain happens every time you run
  • One specific tooth keeps hurting
  • You have swelling or redness in the gums
  • The pain lasts longer than a few hours
  • You notice cracks or chips in your teeth
  • The pain wakes you up at night
  • There’s a bad taste or smell from a tooth

Don’t ignore ongoing tooth pain — it’s a sign your body is trying to tell you something.

When It Might Be a Medical Emergency

In rare cases, tooth pain during exercise can be linked to a serious health issue. Stop running and seek immediate medical help if you also experience:

  • Chest pain or pressure
  • Shortness of breath
  • Dizziness or fainting
  • Pain in your jaw, arm, or back
  • Cold sweats
  • Nausea

These could be signs of a heart issue and need urgent care.

Tips to Keep Your Teeth Healthy as a Runner

Whether you run for fun, fitness, or competition, you can protect your smile with a few simple habits:

  • Brush twice a day with fluoride toothpaste
  • Floss daily to keep gums healthy
  • Drink water instead of sugary drinks
  • Use a mouthguard if you grind
  • Avoid running on an empty stomach to prevent acidic burps
  • Schedule dental cleanings every 6 months
  • Address dental problems early
  • Manage allergies and sinus issues

Strong teeth and healthy gums make every run more enjoyable.

Frequently Asked Questions

Why do my teeth hurt only when I run, not at other times?

Running increases blood flow and pressure in your head, which can trigger sinus pain, dental sensitivity, or hidden tooth issues that don’t bother you while resting.

Can dehydration really cause tooth pain after running?

Yes. A dry mouth lacks saliva, which protects your teeth. Without it, your teeth become more sensitive, and small dental issues can feel much worse.

Should I worry if only my upper teeth hurt after running?

Upper tooth pain is often linked to sinus pressure rather than a dental problem. If it happens repeatedly or with congestion, see your doctor or dentist for help.

Are sports drinks bad for my teeth?

Many sports drinks are high in sugar and acid, which can wear down enamel and cause tooth pain. Drink them in moderation and rinse your mouth with water afterward.

Could tooth pain after running be a sign of something serious?

In rare cases, yes. If tooth pain comes with chest pain, shortness of breath, or sweating, it could be a heart-related issue. Stop running and seek medical care immediately.

If your teeth ache after running and you’re not sure why, don’t ignore it. Schedule a checkup at Ethos Modern Dental & Implant Center. Dr. Sreelakshmi Keesara will help find the cause and provide gentle, expert care so you can get back to running pain-free.

Iron Staining on Teeth: Causes, Risks & How to Stop Teeth Staining from Iron Safely

Have you noticed dark spots, gray patches, or brownish stains on your teeth that just won’t go away no matter how much you brush? You might be dealing with iron staining on teeth. While iron is essential for your body’s health, taking iron supplements or drops can sometimes leave behind unsightly marks on your smile. The good news is — iron stains are usually preventable and treatable when you know what to do.

Whether it’s your child taking iron drops or you’re an adult on iron supplements, here’s everything you need to know about teeth staining from iron, why it happens, and how to safely keep your smile clean.

What Are Iron Stains on Teeth?

Iron stains are dark spots or discoloration on the surface of your teeth caused by the iron in supplements, drops, or certain medications. They are different from cavities — they don’t damage your tooth structure, but they can look like discoloration that’s hard to remove with regular brushing.

Iron stains usually appear as:

  • Dark gray or black spots
  • Brown or yellowish-brown patches
  • Greenish marks in some cases
  • Stains that build up along the gumline
  • Discoloration on the inner surfaces of teeth

They’re more common in children taking liquid iron drops, but adults on iron pills can experience them too.

Why Does Iron Stain Teeth?

Iron stains develop when iron particles in supplements interact with bacteria, saliva, and sulfur compounds in your mouth. This reaction creates dark-colored deposits that stick to your tooth enamel.

Common reasons iron stains appear:

  • Liquid iron drops sitting on teeth too long
  • Not rinsing or brushing after taking iron
  • Iron-rich water from old plumbing
  • Iron supplements with high doses
  • Poor oral hygiene
  • Certain medications combined with iron

The good news is, iron stains are mostly surface-level — meaning they can be cleaned off without permanent damage to your teeth.

Who Is Most at Risk for Iron Staining on Teeth?

Iron stains can happen to anyone taking iron supplements, but they’re more common in certain groups:

  • Babies and toddlers taking liquid iron drops
  • Pregnant women prescribed iron supplements
  • People with anemia on long-term iron therapy
  • Vegetarians and vegans taking iron pills regularly
  • Older adults on iron treatment for low blood count
  • People drinking well water with high iron content

If you fall into one of these groups, you should be extra careful about preventing stains.

Are Iron Stains on Teeth Harmful?

This is one of the biggest questions parents and patients ask — and the answer is reassuring.

Iron stains are mostly a cosmetic concern. They don’t:

  • Cause cavities
  • Weaken your enamel
  • Lead to gum disease
  • Damage tooth structure
  • Affect tooth function

However, they can still cause issues if left untreated:

  • Lower confidence due to dark spots on teeth
  • Build up of plaque underneath stains
  • Higher risk of bacteria sticking to teeth
  • Bad breath in some cases
  • Embarrassment for kids in school

So while they aren’t medically dangerous, they’re worth treating for both health and confidence reasons.

How to Prevent Iron Staining on Teeth

The best way to deal with iron stains is to stop them before they form. These simple tips can help:

For Adults

  • Take iron pills with a full glass of water
  • Use a straw if you’re drinking liquid iron
  • Rinse your mouth thoroughly after taking iron
  • Brush your teeth 30 to 60 minutes after taking iron
  • Use a fluoride toothpaste daily
  • Avoid swishing iron supplements in your mouth
  • Schedule regular dental cleanings every 6 months

For Babies and Toddlers

  • Use a dropper to place iron behind the back teeth or toward the back of the mouth
  • Give iron drops at the start of a meal, not after
  • Follow with water or breast milk to rinse the mouth
  • Wipe baby’s teeth with a soft, damp cloth after the dose
  • Brush gently with a baby toothbrush twice a day
  • Avoid sugary drinks right after iron drops
  • Start dental visits by your child’s first birthday

These small habits can make a huge difference in keeping iron stains at bay.

How to Safely Remove Iron Stains from Teeth

If iron stains have already formed, don’t worry — there are safe and effective ways to clean them up.

1. Professional Dental Cleaning

This is the most effective way to remove iron stains. Dentists use special tools and gentle polishing to lift stains without damaging enamel.

Benefits:

  • Removes deep stains that toothpaste can’t
  • Polishes teeth for a smoother surface
  • Helps prevent future buildup
  • Safe for kids, adults, and pregnant women
  • Quick and painless

For most people, one or two cleanings can completely remove iron stains.

2. Whitening Toothpaste (Use With Caution)

Mild whitening toothpastes can help fade lighter iron stains over time. Look for products that are:

  • Approved by the American Dental Association
  • Low in abrasiveness
  • Free of harsh chemicals
  • Recommended by your dentist

Avoid using whitening toothpaste on children unless their dentist approves.

3. Baking Soda Brushing (Adults Only)

A gentle baking soda rinse or brushing can help with light surface stains, but it should be used sparingly to avoid wearing down enamel.

How to use it:

  • Mix a small amount with water to make a paste
  • Brush gently once or twice a week
  • Rinse thoroughly afterward
  • Avoid using it on sensitive teeth

Always check with your dentist before using baking soda regularly.

4. Switching to a Different Iron Supplement

If iron stains keep coming back, your doctor may recommend switching to:

  • Iron pills instead of liquid drops
  • A lower-dose iron formula
  • Iron-rich foods instead of supplements
  • A chewable or coated iron tablet

Never stop taking iron without talking to your doctor first.

5. Professional Stain Removal Treatments

For stubborn iron stains, your dentist may recommend:

  • Air polishing
  • Ultrasonic scaling
  • In-office whitening
  • Polishing with a fine paste

These treatments are completely safe and provide noticeable results in a single visit.

What Not to Do About Iron Stains

Some home remedies can actually make stains worse or damage your teeth. Avoid:

  • Scrubbing too hard with a toothbrush
  • Using lemon juice or vinegar on your teeth
  • Rubbing teeth with hard objects
  • Using whitening products on small children
  • Skipping dental cleanings
  • Stopping iron supplements without doctor approval

When in doubt, see your dentist first.

When to See a Dentist

You should book a dental visit if:

  • Your teeth have visible dark stains
  • Your child’s teeth look dark or discolored
  • Brushing isn’t removing the stains
  • You notice sensitivity or pain
  • It’s been more than 6 months since your last cleaning
  • You’re starting a new iron supplement

A simple cleaning is usually all it takes to bring back a clean, healthy smile.

Tips to Maintain a Stain-Free Smile While Taking Iron

Even while on iron, you can keep your teeth looking great with these everyday habits:

  • Brush twice daily with fluoride toothpaste
  • Floss every day to remove buildup between teeth
  • Drink water after meals and iron doses
  • Limit sugary drinks and snacks
  • Get a dental cleaning every 6 months
  • Take iron with meals when possible
  • Talk to your doctor about the right form of iron for you

A little consistency can save you a lot of stain trouble down the road.

Frequently Asked Questions

Are iron stains on teeth permanent?

No. Iron stains are usually surface-level and can be safely removed with a professional dental cleaning. They don’t damage your tooth structure.

Why do my child’s teeth turn black after taking iron drops?

The iron in liquid drops can react with bacteria and saliva in the mouth, leaving behind dark deposits. Wiping or brushing your child’s teeth after each dose helps prevent this.

Can I whiten iron stains at home?

Mild whitening toothpaste can help with light staining, but professional dental cleaning is the safest and most effective option. Avoid harsh DIY remedies that can damage enamel.

Should I stop taking iron because of teeth stains?

No. Never stop taking iron without your doctor’s approval. Instead, talk to your dentist about ways to manage and prevent stains while continuing your treatment.

How often should I get a dental cleaning if I take iron supplements?

Every 6 months is the general recommendation. If you notice quick buildup of stains, your dentist may suggest more frequent cleanings — every 3 to 4 months.

If you’re worried about iron stains on your teeth or your child’s smile, schedule a cleaning at Ethos Modern Dental & Implant Center. Dr. Sreelakshmi Keesara provides gentle, expert dental care that safely removes stains and helps your whole family enjoy a brighter, healthier smile.